First, open up an existing campaign and navigate to the “Builder” section.

Next, you can create a custom post by clicking the “Custom Post” button.
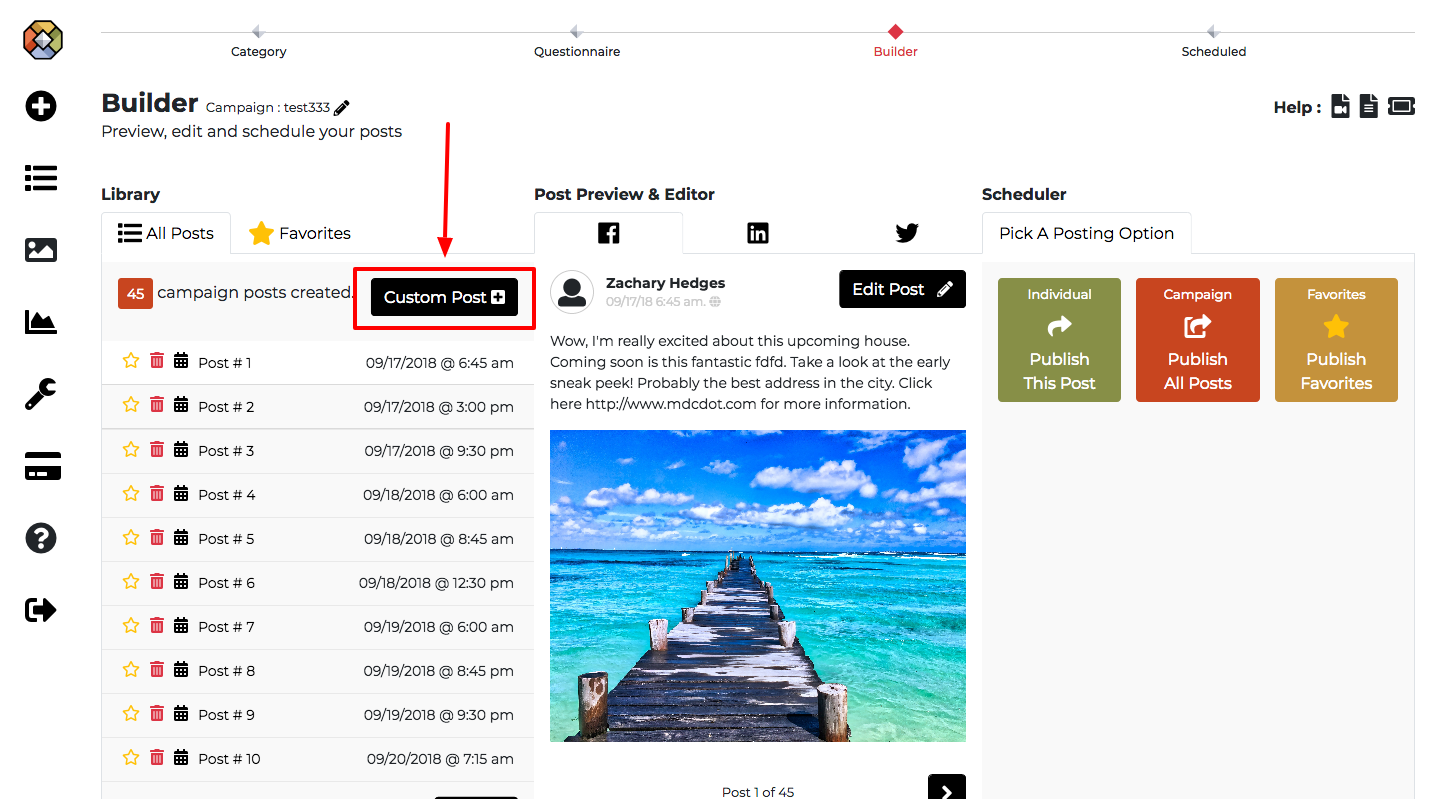
Before the post is created and added to your campaign’s library you have to do the following two steps:
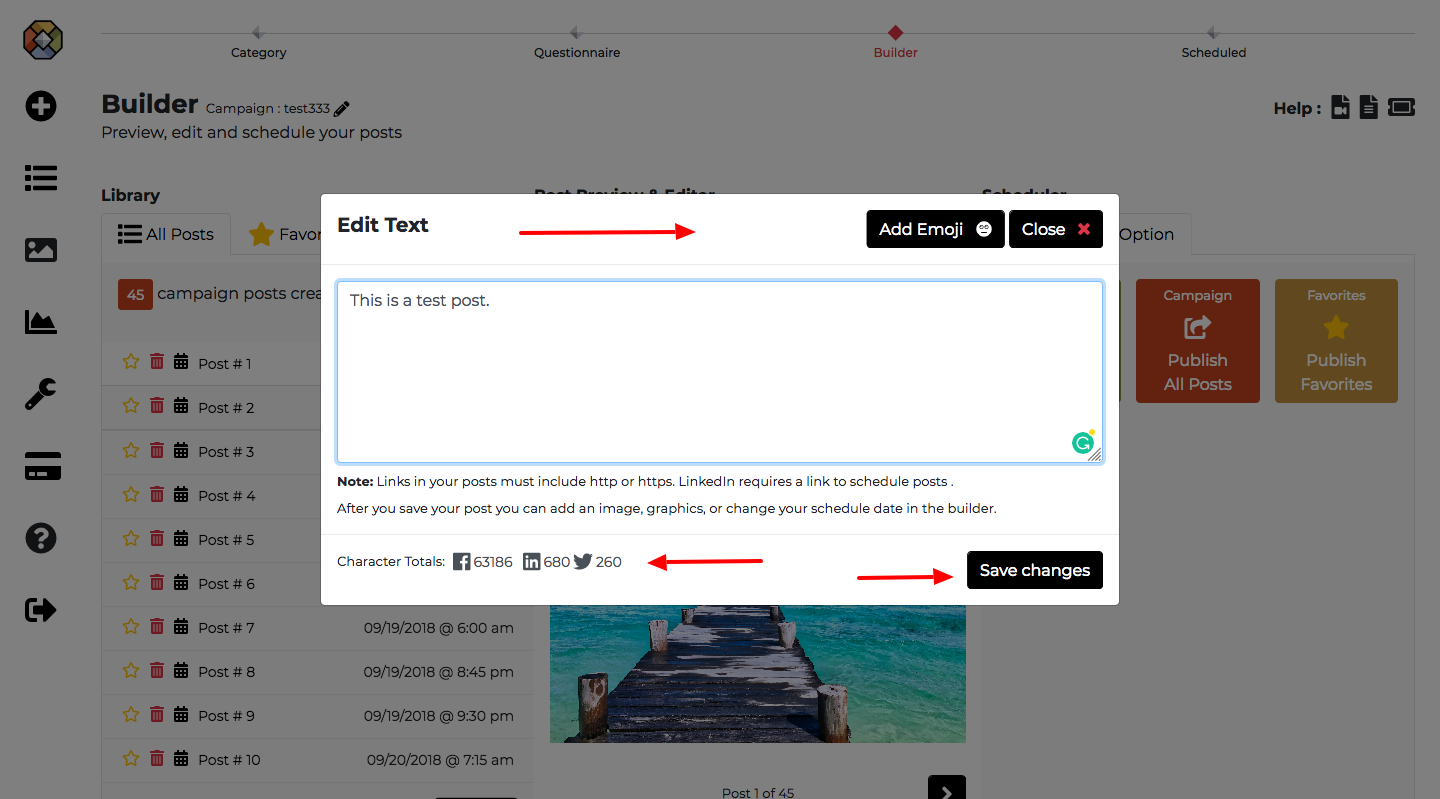
First, pick a date and time for when you want the post to publish (you can always change this at a later time before you schedule the post).

Second, you need to add text for the post you want to create and click the “Save Changes” button. The character counter lets you know if your text is hitting the character limit for the social network. You also have options to add emojis and run a spell check.
At that point, the post will be added to your library.
Note: Your list of posts will reorder itself, and your custom post will be in the list by the date and time you set.
Note: Links in your posts must include HTTP or https. LinkedIn requires a link to schedule posts.
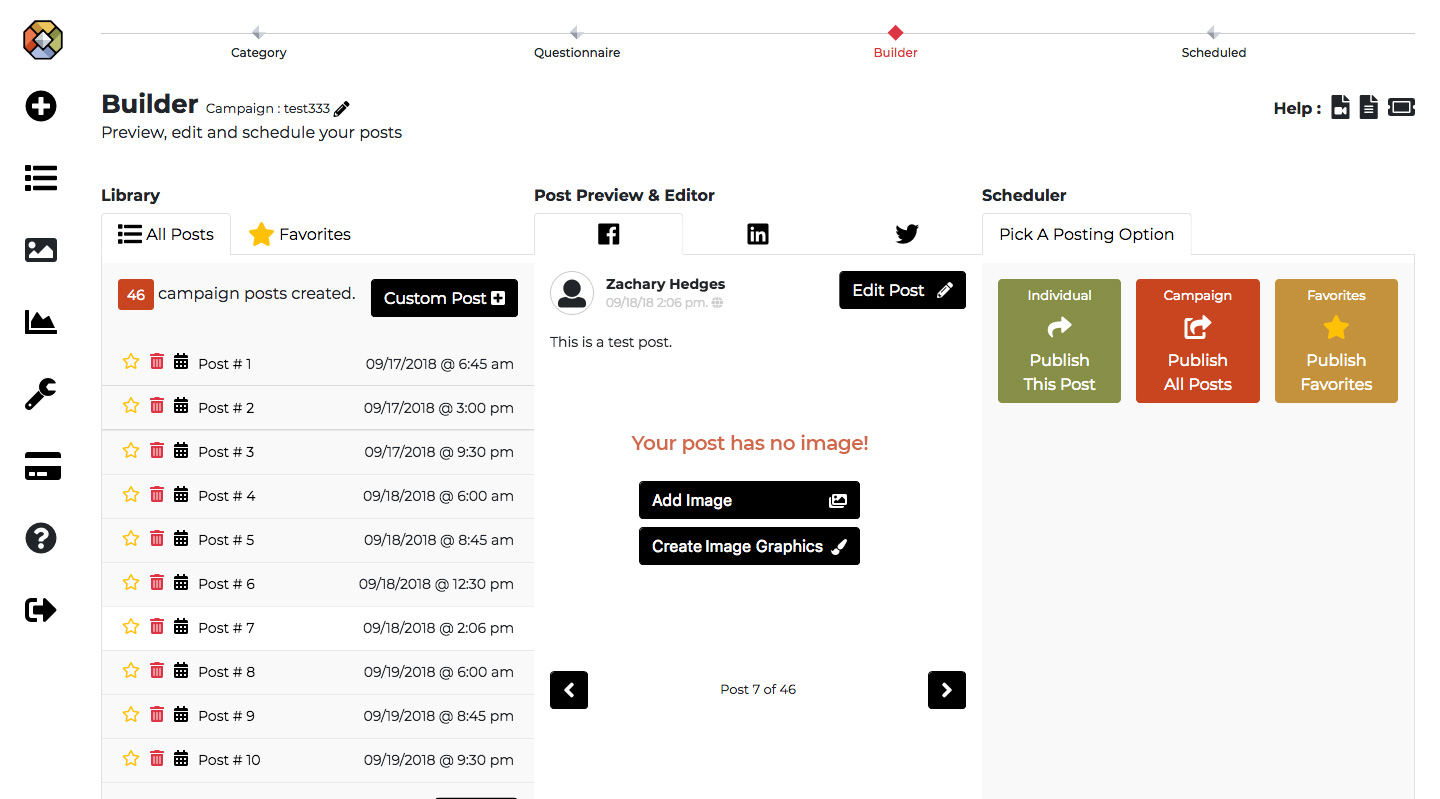
Now that your post is created you can add an image or create an image graphic.
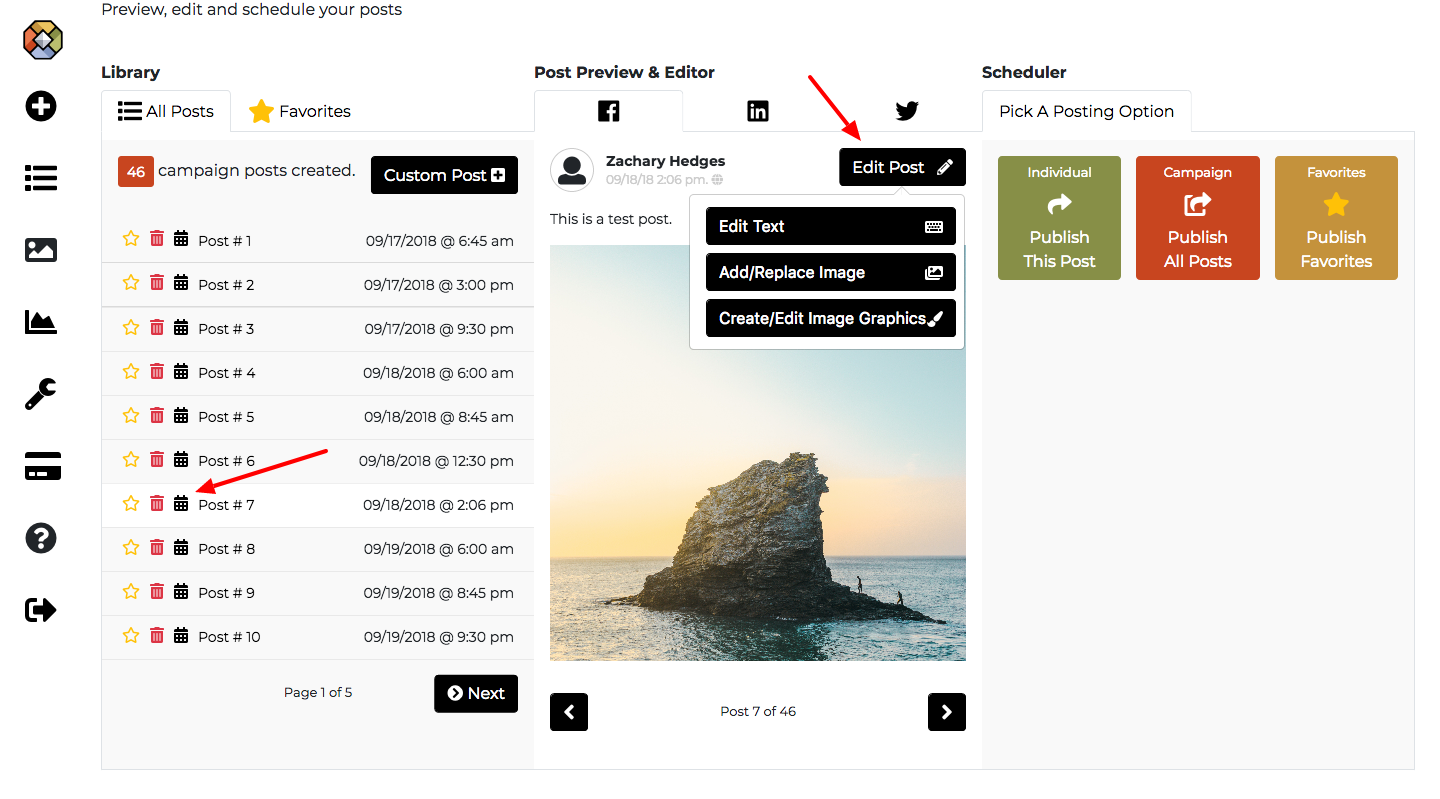
At anytime click the “Edit Post” button to edit the text or image for your post. If you want to change it’s publish date then click the “calendar” icon next to the post in the “Library” section.